Deploying Reactive Contracts with Remix
Overview
This guide will walk you through deploying the basic Reactive Network Demo using the Remix Development Environment. The demo includes three contracts: the origin contract BasicDemoL1Contract.sol, the destination contract BasicDemoL1Callback.sol, and the reactive contract BasicDemoReactiveContract.sol.
Prerequisites
Before getting started, ensure you have a basic understanding of the following:
- Solidity – Smart contract programming language
- MetaMask – Web3 wallet for interacting with the blockchain
- Remix – Online Solidity IDE for smart contract development
You'll also need three smart contracts, along with their abstract contracts and interfaces, to run the demo. All contracts should remain in the same folder. Download all the necessary files using the button below:
Additionally, you'll need kREACT (testnet REACT for Reactive Lasna) to complete the demo. To receive kREACT, send SepETH to the Reactive faucet contract on Ethereum Sepolia:
0x9b9BB25f1A81078C544C829c5EB7822d747Cf434
The exchange rate is 1/100, meaning you'll receive 100 REACT for 1 SepETH sent. To connect your MetaMask wallet to the Reactive Lasna, use the button below:
Do not send more than 5 SepETH per request, as doing so will cause you to lose the excess amount without receiving any additional REACT. The maximum that should be sent in a single transaction is 5 SepETH, which will yield 500 REACT.
Origin Contract
-
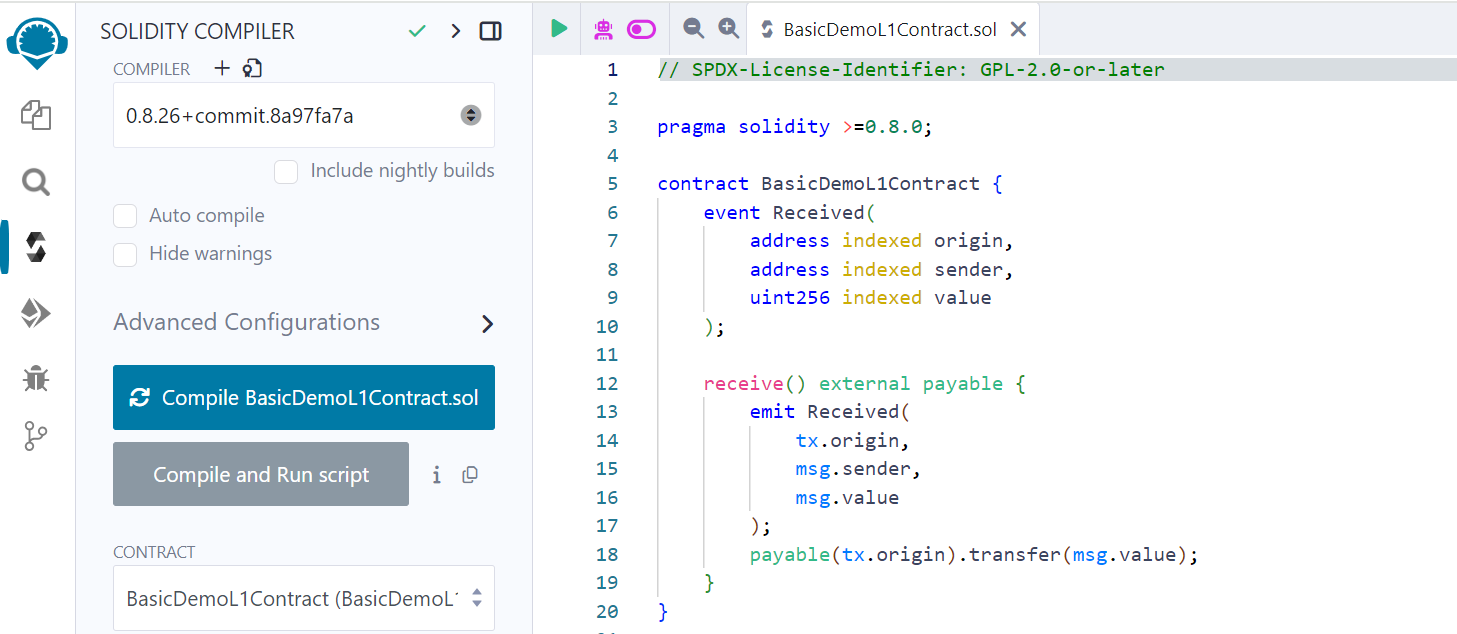
Open BasicDemoL1Contract.sol in Remix.
-
Compile the contract.
- Deploy the contract on any supported origin chain.
-
Open MetaMask and select the required chain.
-
In Remix, in the Deploy & Run Transactions tab, select "Injected Provider — MetaMask" as your environment.
-
Click the Deploy button. MetaMask will prompt you to confirm the transaction. Check the transaction details to ensure you are deploying the contract to the right chain.
-
After you confirm the transaction, the contract address will appear in the Deployed Contracts list. Copy this contract address. This will be the
_contractaddress in the reactive contract.
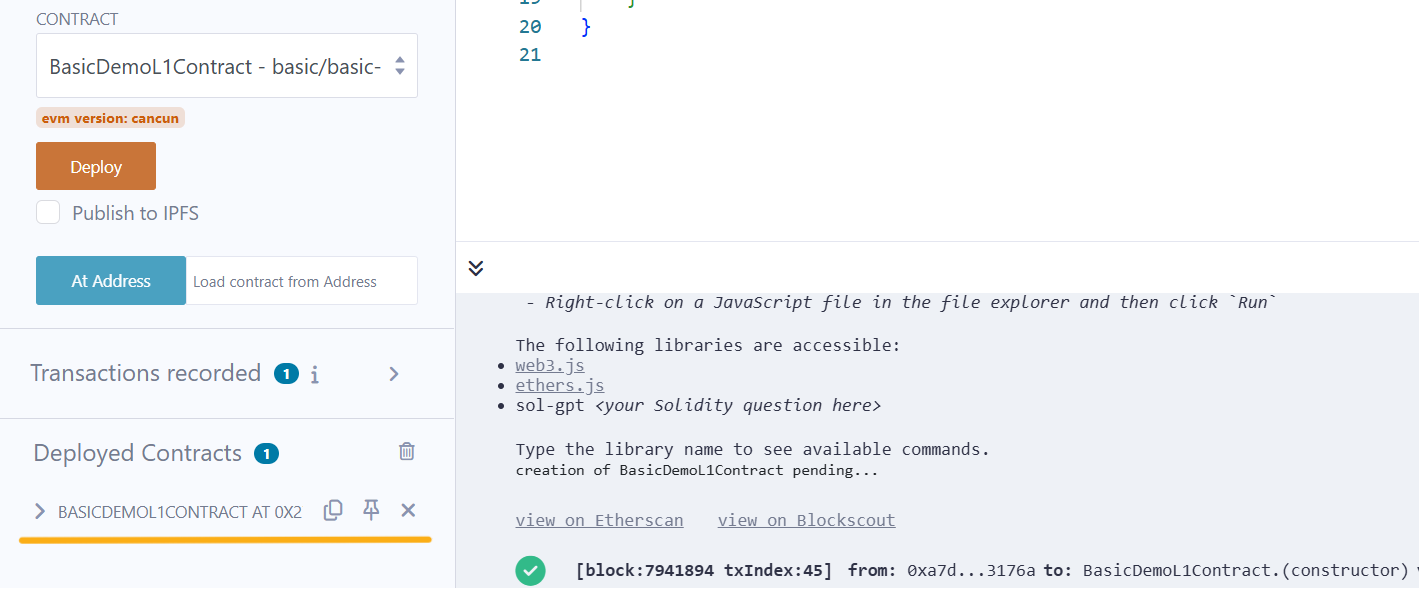
- Check the transaction details using the contract address on the relevant block explorer.
Destination Contract
-
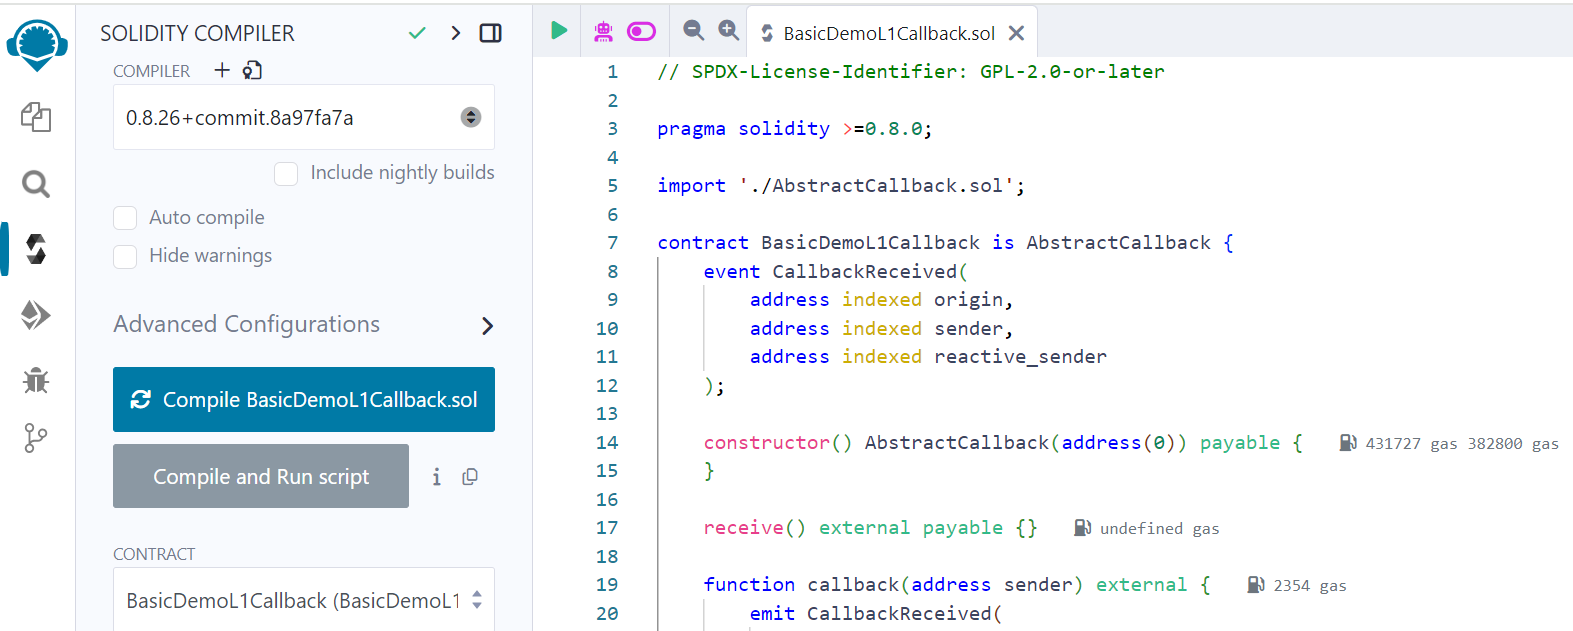
Open BasicDemoL1Callback.sol in Remix.
-
Compile the contract.
- Deploy the contract on any supported destination chain.
-
Open MetaMask and select the required chain.
-
In Remix, in the Deploy & Run Transactions tab, select "Injected Provider — MetaMask" as your environment.
-
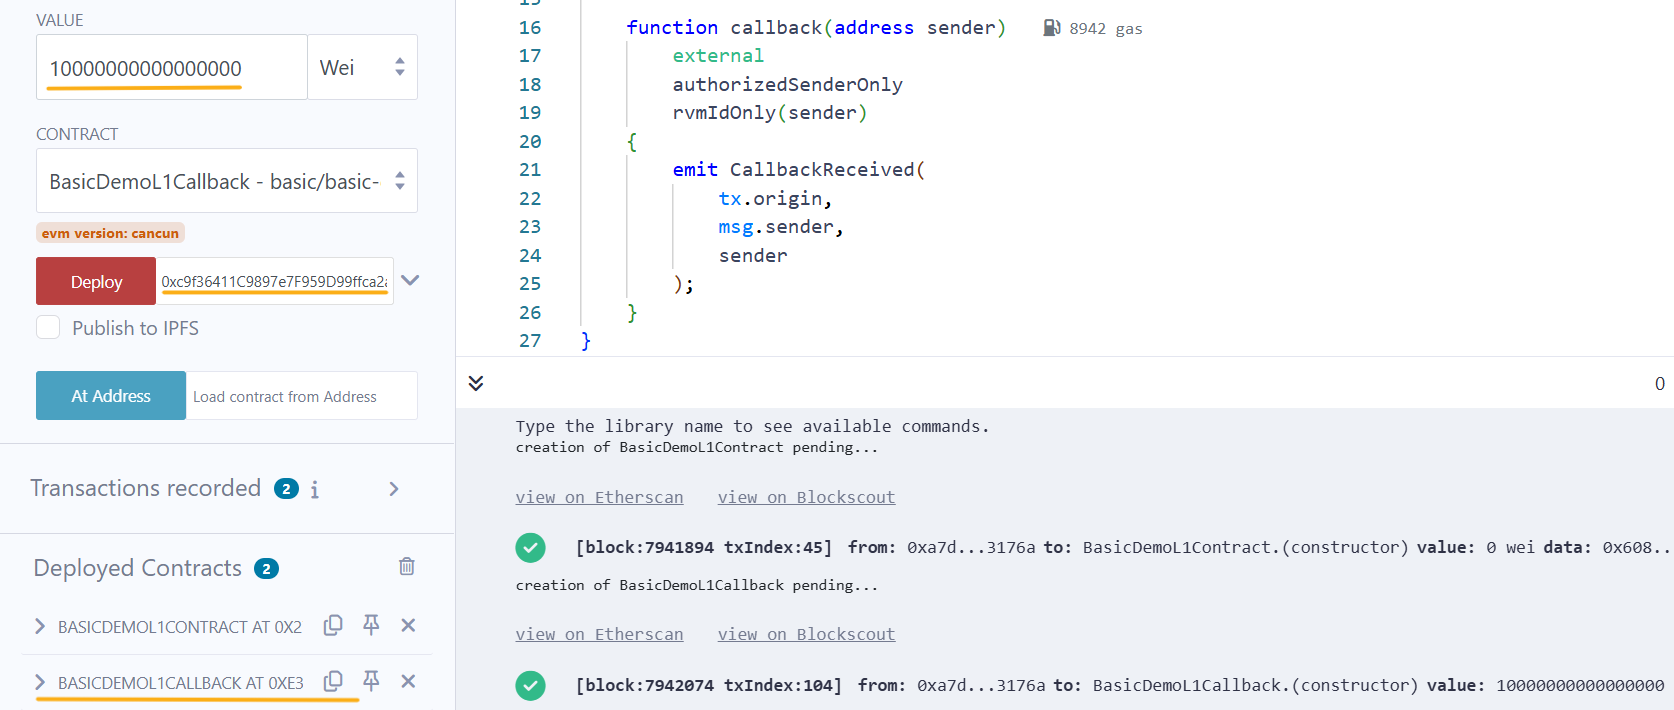
Provide 0.01 Ether (or 10,000,000,000,000,000 Wei) as the transaction value and include
_callback_sender— a callback proxy address that is unique to each chain. -
Click the Deploy button. MetaMask will prompt you to confirm the transaction. Check the transaction details to ensure you are deploying the contract to the right chain.
-
After you confirm the transaction, the contract address will appear in the Deployed Contracts list. Copy this contract address. This will be the
_callbackaddress in the reactive contract.
- Check the transaction details using the contract address on the relevant block explorer.
Reactive Contract
-
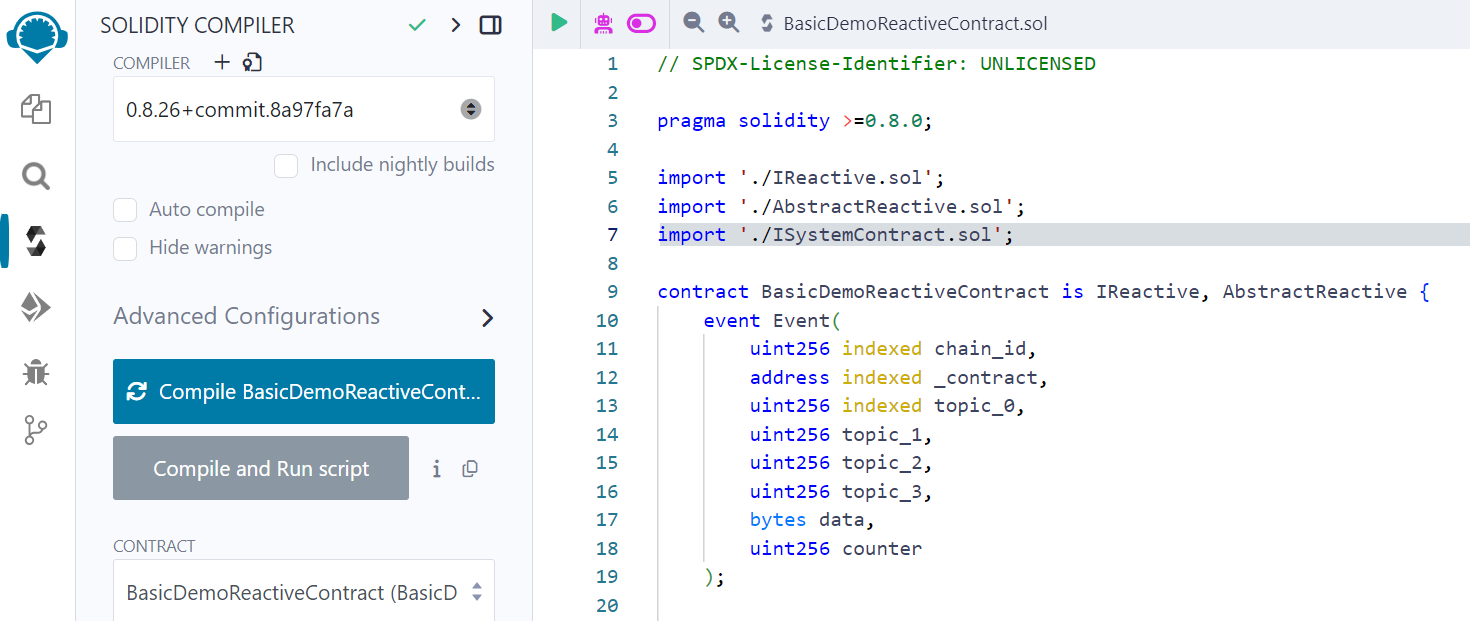
Open BasicDemoReactiveContract.sol in Remix.
-
Compile the contract.
- Deploy the contract to Reactive Lasna.
-
Open MetaMask and select Reactive Lasna.
-
In Remix, in the Deploy & Run Transactions tab, select "Injected Provider — MetaMask" as your Environment.
-
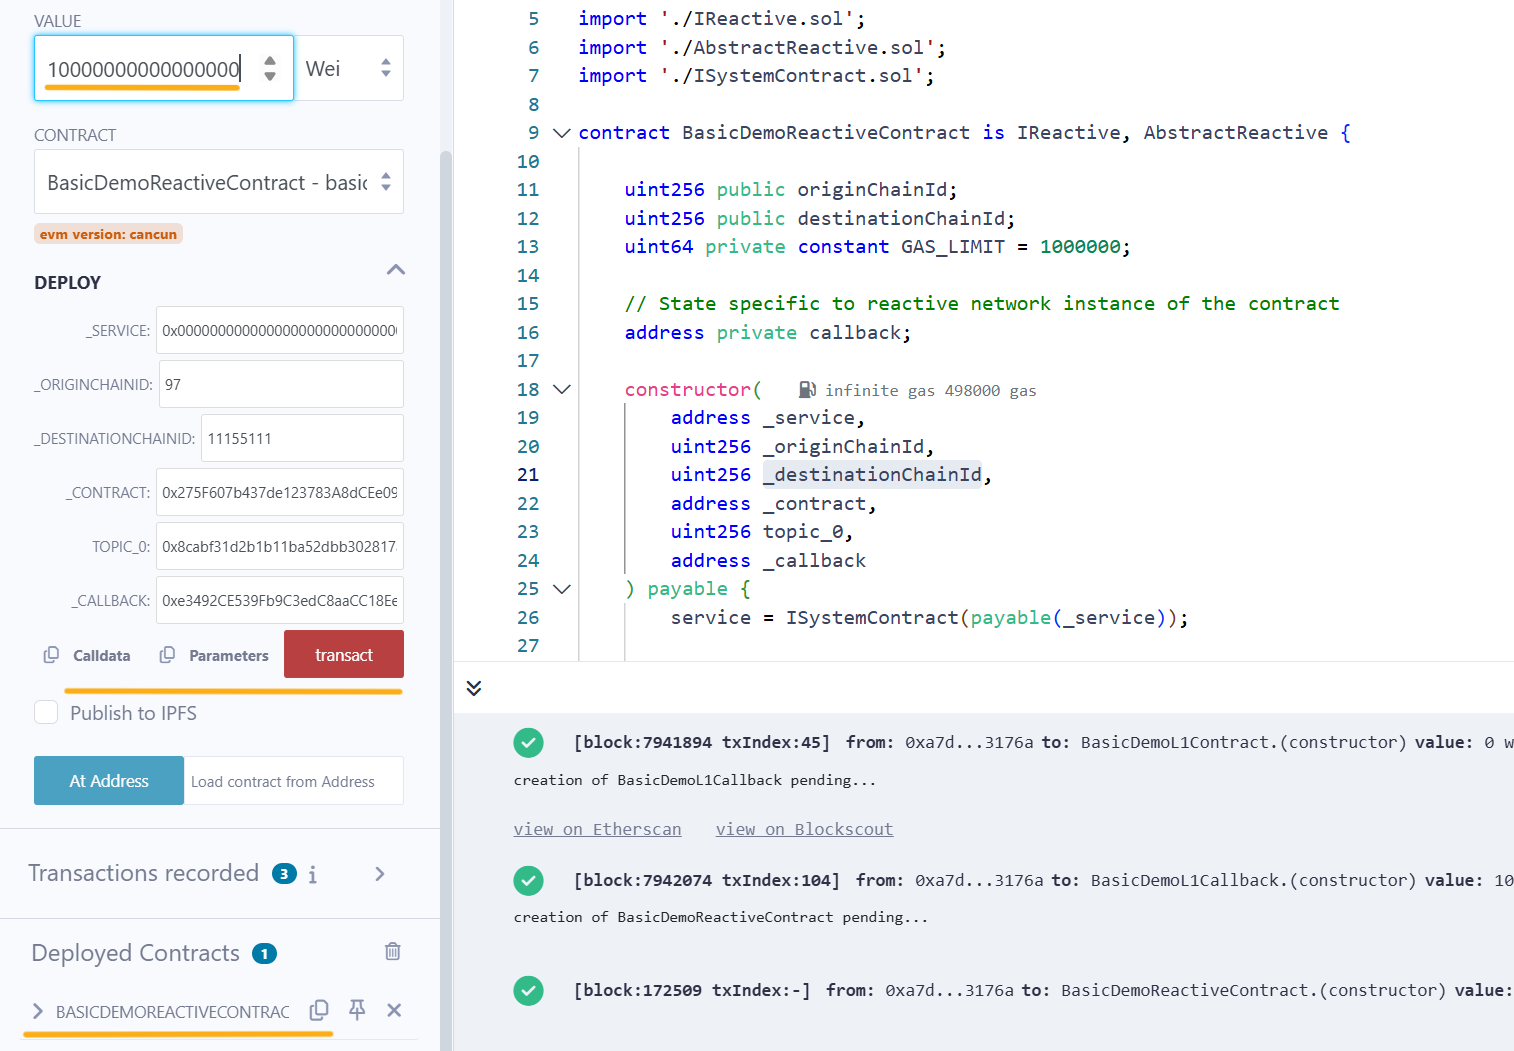
In the Deploy section, fill out the following fields:
_service: the Reactive network system contract address0x0000000000000000000000000000000000fffFfF._originChainId: the origin chain ID (see Origins & Destinations)._destinationChainId: the destination chain ID (see Origins & Destinations)._contract: the origin chain contract address.topic_0: TheReceivedevent on the origin chain contract0x8cabf31d2b1b11ba52dbb302817a3c9c83e4b2a5194d35121ab1354d69f6a4cb._callback: the destination chain contract address. -
Click the transact button. MetaMask will prompt you to confirm the transaction. Check the transaction details to ensure you are deploying the contract to Reactive Lasna.
-
After you confirm the transaction, the contract address will appear in the Deployed Contracts list. Copy this contract address if needed.
- Once the reactive сontract is successfully deployed, check the transaction details using the contract address on Reactive Scan.
To receive a callback on the destination chain contract, you should send 0.01 ether to the origin chain contract via Metamask. To see the callback, check the destination contract's events on the relevant block explorer.